Image may be NSFW.
Clik here to view.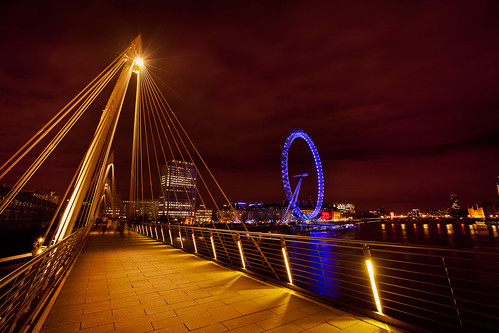
Many beginner photographers ask me how to take great night shots, so I thought I would share some simple tips for taking long exposures.
First, here is a list of the gear that will help you get a clear, sharp image:
1. Tripod:
You need to keep your camera as steady as possible, so unless you can find a ledge, wall or post that you can set your camera on you’ll need a tripod. I use the Manfrotto 055CXPRO3 Carbon Fiber 3 Section Tripod, with a Manfrotto 498RC2 Ball Head ($500). You don’t need a tripod this expensive, but avoid the $29.99 ones you buy at your local drug store. I had one of these and I nearly lost my camera in the ocean because it was so unsteady and frail. With tripods you pay more for lightweight models. For me this is important because I have a bad back, so I need something that is no more than 4 lbs. But, if you are a big buff photog, you can probably manage something a bit heavier. ;)
Image may be NSFW.
Clik here to view.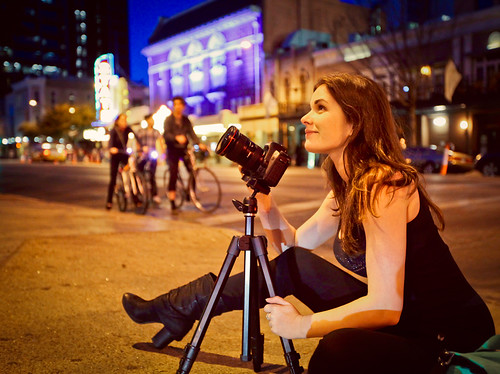
2. Remote Cable Release
You want to avoid any camera shake during long exposures, so it’s best if you use a cable release remote to trigger the shutter. I prefer the wired models to the wireless ones because they always work and batteries always have this nasty habit of failing when you need them most. Cable releases are camera specific, so make sure you get the right model. If you don’t have a remote, you can always set your camera to 10s self-timer mode which will give your camera enough time to settle after you press the button and hopefully not cause any movement in your shot. I often use this method and it works fine, but if you are planning on doing a lot of night photography or self-portraits a remote is a good investment.
Image may be NSFW.
Clik here to view.
3. Lens Hood.
I rarely use lens hoods during the day because I love lens flare, but over-powering street lights can ruin night shots. If you plan on shooting in a well-lit city make sure you bring your lens hood!
4. Flash Light or head lamp or cell phone.
If it’s dark and you drop your lens cap in a bush, or you need to change lenses on a windy beach, or you need to change your camera’s settings in the pitch black, you’ll thank yourself for carrying a flash light! Cell phones are decent, but sometimes they don’t have enough light to see what you are doing. If you want to be hard core, you can buy a little LED head lamp that you can wear during your night shooting escapades. I used one when I was shooting out in the bush in Jackson Hole. Would I wear one in NYC? Not so much. :P
While I can’t give you a specific camera setting to use for night photography because every situation is different, here is a general guideline.
Image may be NSFW.
Clik here to view.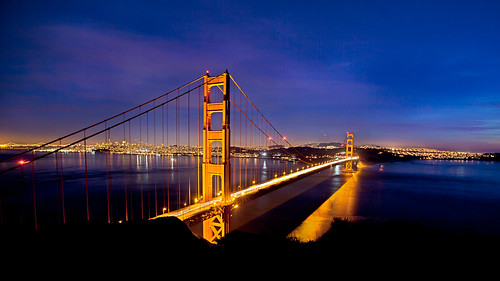
1. Set your camera on Manual (M):
You’ll need full control of the Aperture and Shutter speed of your camera for night photography. If you use your camera’s Auto settings your photos will either turn out too dark, or with a lot of unwanted movement or ghosting of lights. If you’ve never used your camera’s Manual settings, I encourage you to head out one night and give it a try!
2. Use a shutter speed from 5s-15s.
Longer shutter = My photo is too dark, I need more light. I took the above photo just after sunset and there was still a lot of light, so I only needed a 3.2s exposure to get enough light in my shot. 30 minutes later, I needed to increase my shutter speed to 10 seconds to get the same exposure. If it’s totally pitch black, or you want to capture star trails, you may need to use a shutter speed of 30s or more. In this case, switch your camera to Bulb mode. You can trigger when you want your exposure to start and end. I use my iPhone’s timer to keep track of time.
3. Keep your ISO as low as possible.
I always shoot on ISO 100 to get the least noise as possible. Since you are using a tripod you don’t need to increase your ISO to get a brighter exposure.
Image may be NSFW.
Clik here to view.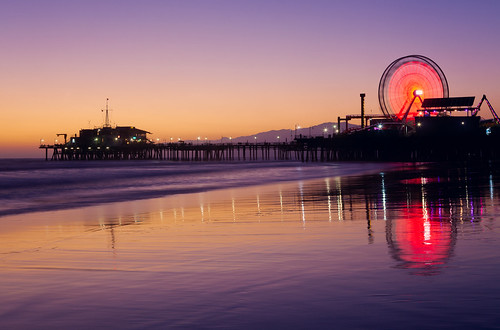
4. Set your Aperture for the optimal depth of field that you want.
There are two main aperture settings for night photography.
Shoot with your aperture wide open (f/1.4-f/4 depending on your lens). Wide Aperture = More light. Use this if your subject will benefit from a shallow depth of field for example, a lit fountain in front of a building where you want the fountain to be in focus and the building slightly blurred. You can also use a wide aperture if you don’t have a tripod or want to stop any movement in your shot because your shutter speed will be much faster if your aperture is wide. Note: Using a wide aperture will give street lights in your photo a slight halo, so if you don’t like the look of this use a higher aperture.
Shoot with a smaller aperture (f/9.0 and higher). Use this if you want everything in focus. It works best to capture landscapes, cityscapes, car tail lights with motion blur, water or star trails. Also, using a smaller aperture will give street lights a “star-like” effect which can yield really cool photos.
If you want to play it safe you can shoot right in the middle around f/5.0-f/8.0.
Image may be NSFW.
Clik here to view.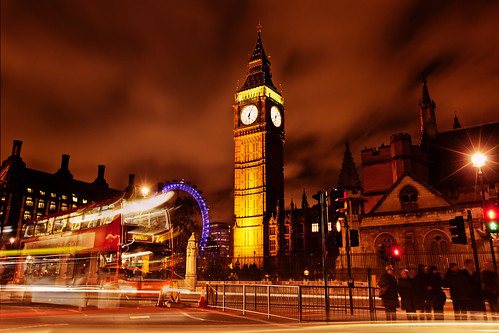
5. Catch Focus, even in the pitch black!
Most cameras will have difficulty focusing using auto-focus in dark conditions. Auto-focusing can work at night if you your subject has enough light, like a well-lit bridge or building, but more often than not you’ll have to use Manual focus. If you are trying to shoot a dark statue, you can shine a flash light beam on the statue and grab your focus that way or use Live View. To use Live View, simply turn it on, increase your ISO so that you can see your subject more clearly, pick something to focus on, zoom in, manually focus and turn Live View off, reset your ISO settings to 100/200 and you are ready to go. If you don’t have Live View, then you can use infinity focus (the ∞ symbol) on the distance indicator of your lens. Place the dot or mark right in between the ∞ and your focus will be infinite. Some lenses aren’t tack sharp at infinity focus so make sure you test out your lens before taking any important shots.
I hope that this guide helps keep you motivated and inspired to get out and take some night photos. Please share your shots in the comments or on your Google+ page. Can’t wait to see your shots! :)